
Connect Home Assistant
RoboAlarms connects directly to Home Assistant over your local network. It does not need an MQTT broker. Despite the repository name ha-addon, this is a custom integration, not a Supervisor app/add-on.
Before you begin
Section titled “Before you begin”- Home Assistant 2026.3 or newer, with administrator access.
- HACS installed if using the recommended installation method.
- A matching RoboAlarms panel build, connected to the network.
- The panel’s master or installer code and access to its screen.
- All partitions disarmed before changing panel settings.
The current integration is a testing release. Use the software versions approved for your installation.
1. Install the integration
Section titled “1. Install the integration”In HACS:
- Open its menu and select Custom repositories.
- Enter https://github.com/RoboAlarms/ha-addon.
- Choose Integration as the repository type and add it.
- Find RoboAlarms, open its entry and download it.
- Restart Home Assistant when the download is complete.
If you do not yet have HACS, follow the official HACS setup instructions. HACS setup includes its own GitHub authorization; this is separate from pairing your panel.
Manual alternative: copy the repository’s custom_components/roboalarms directory into Home Assistant’s config/custom_components/ directory, then restart Home Assistant. Avoid an extra nested directory: the manifest must be at config/custom_components/roboalarms/manifest.json.
2. Enable the panel connection
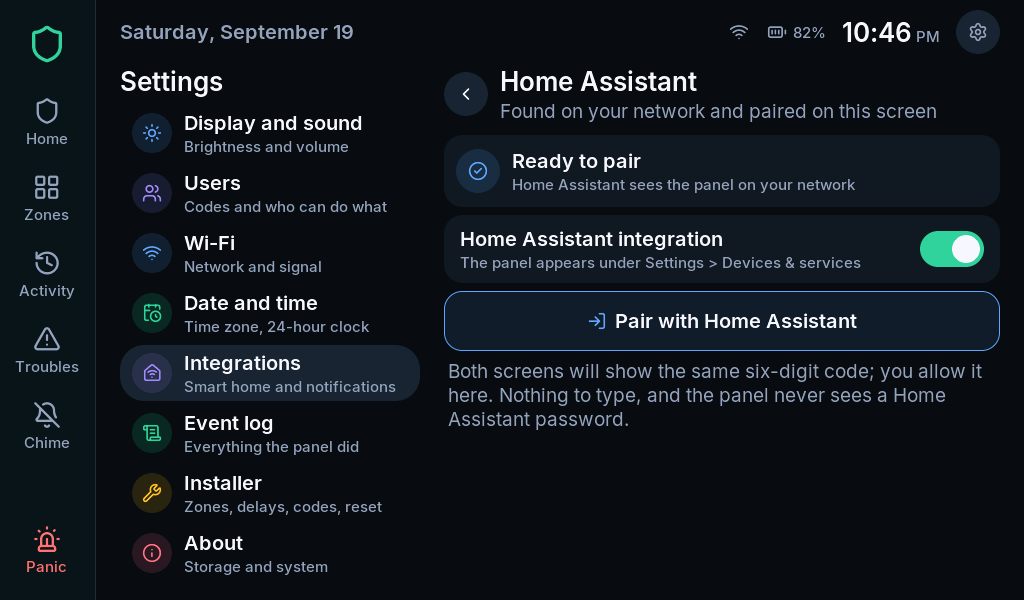
Section titled “2. Enable the panel connection”- On the panel, open Settings > Integrations > Home Assistant.
- Authenticate with a master or installer code if asked.
- Turn on Home Assistant integration.
3. Add the panel in Home Assistant
Section titled “3. Add the panel in Home Assistant”Open Settings > Devices & services. If the panel is discovered, select its Add action.
If it is not discovered, choose Add integration, search for RoboAlarms, and enter the panel’s host/address. The normal port is 6054. Use the address displayed on the panel, not an example address from a screenshot.
Select RoboAlarms Panel in the results, enter Host and Port, then select Submit.
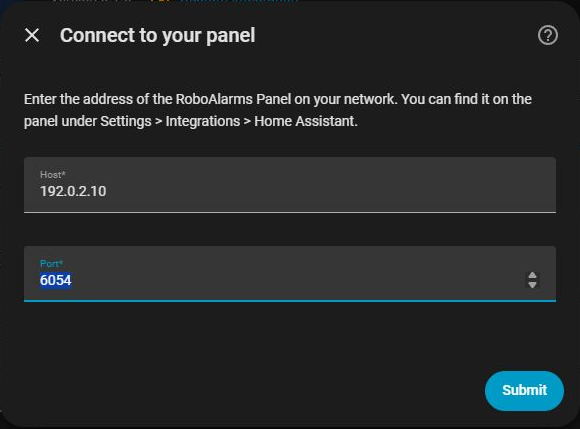
Automatic discovery normally needs the same subnet. Across routed networks, use manual addressing and allow the connection to the panel; mDNS discovery needs additional network configuration.
4. Open pairing on the panel
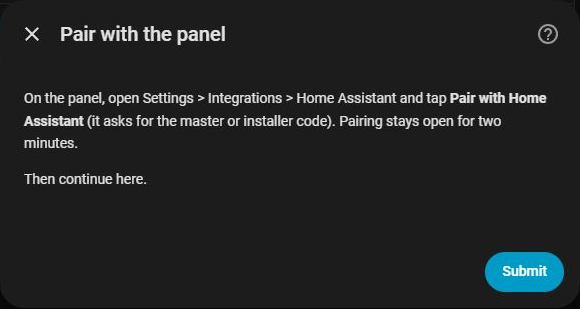
Section titled “4. Open pairing on the panel”When Home Assistant asks you to pair:
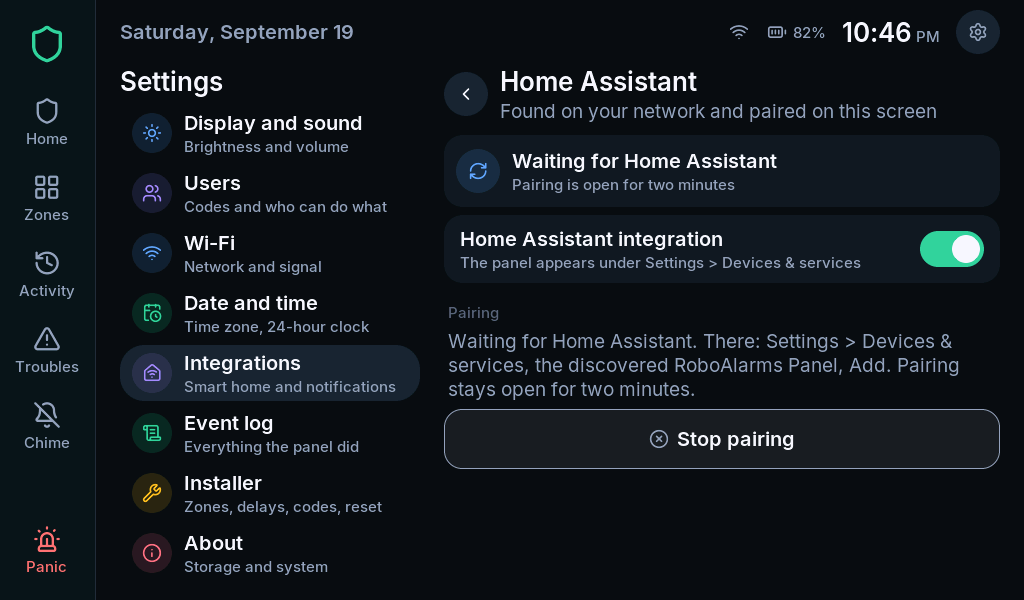
- On the panel’s Home Assistant page, select Pair with Home Assistant.
- Enter the requested master or installer code.
- Continue the flow in Home Assistant before the two-minute pairing window expires.
5. Compare the two codes
Section titled “5. Compare the two codes”Home Assistant and the panel each show six digits. Compare all six.
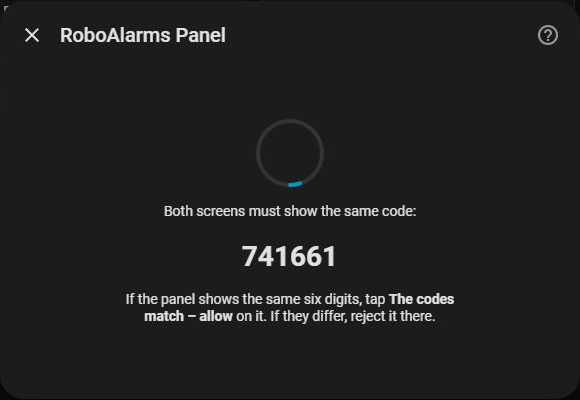
- If they match, select The codes match - allow on the panel.
- If they differ, select the rejection action and stop. Do not accept a mismatch.
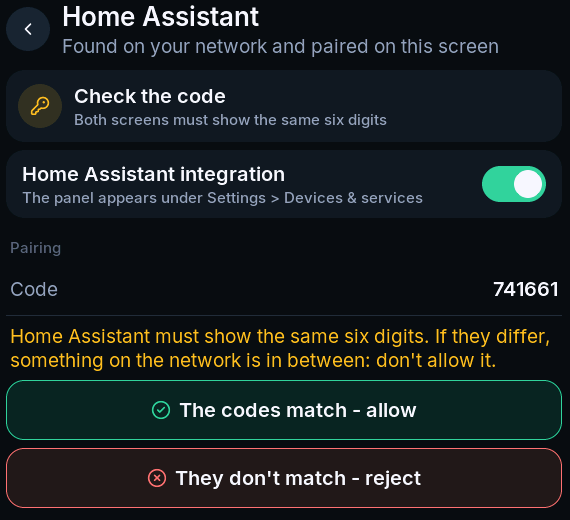
The pairing number is not an alarm code and does not become a code you use to disarm.
6. Confirm success
Section titled “6. Confirm success”Finish the Home Assistant flow. Check that the panel page reports a paired/connected state and that its device and zone entities appear in Home Assistant.
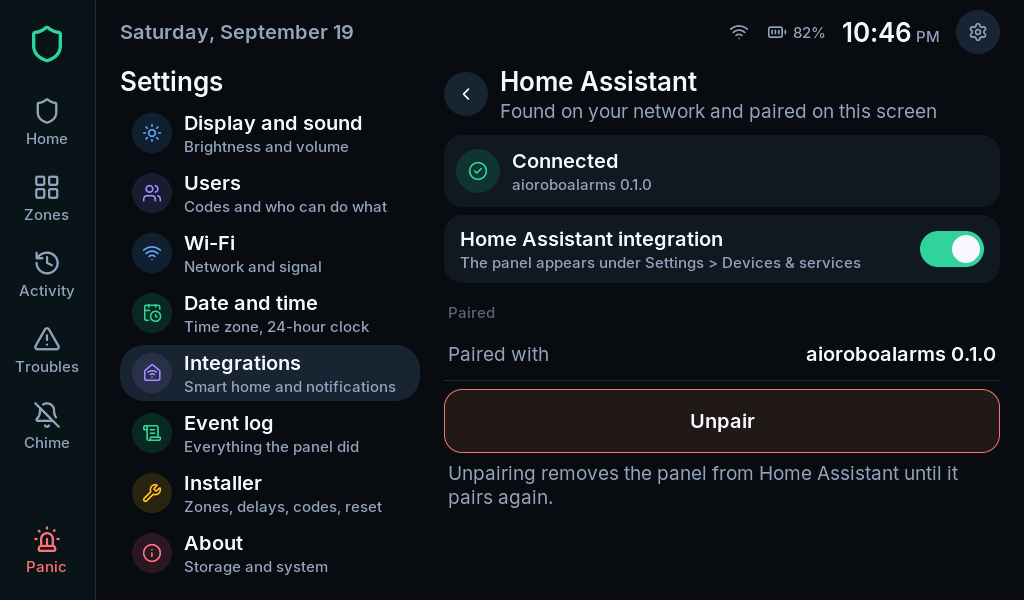
Home Assistant gets the alarm partitions, zones and supported diagnostic entities. Arming and disarming through this integration require a user code.
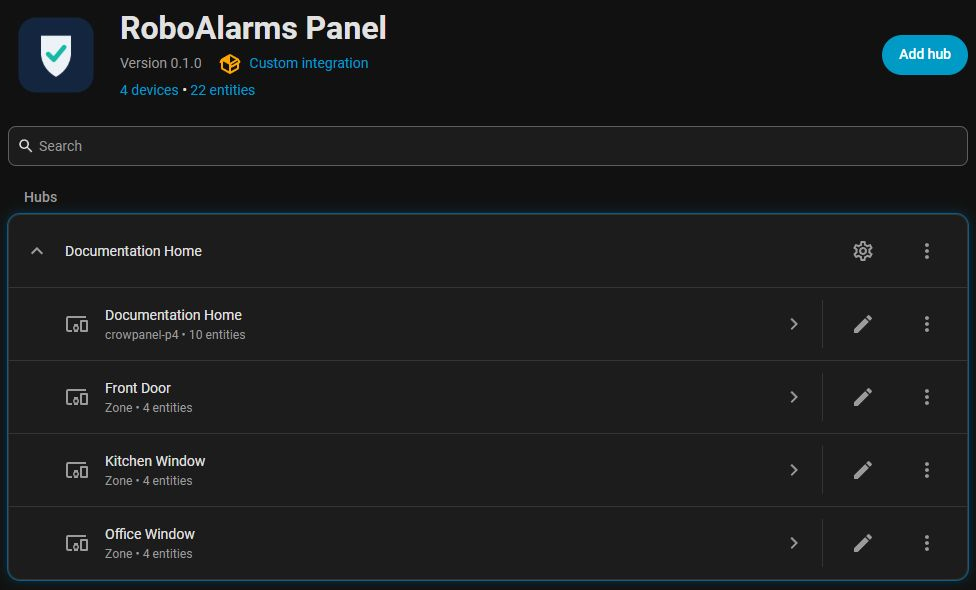
Pairing does not automatically share all Home Assistant devices with the panel. That is a separate permission step in Use Home Assistant sensors.
If pairing fails
Section titled “If pairing fails”| Message or symptom | What to do |
|---|---|
| RoboAlarms is absent from Add integration | Confirm the integration downloaded to the correct directory and restart Home Assistant |
| Could not reach the panel | Check network reachability, integration enablement and TCP 6054 |
| The panel isn’t pairing right now | Open pairing on the panel, then retry |
| Pairing timed out | Start a new two-minute window and continue promptly |
| Already configured | Open the existing integration rather than adding it again |
| Certificate changed / pair again | Verify the panel’s identity and use reauthentication; expected after a factory reset |
| Protocol incompatible | Use compatible integration and panel versions |
For an address change, use Reconfigure on the existing integration. This preserves the pairing and entities when it is the same panel.